
We know you want the right part, the first time. No gimmicks, no lofty lingo, just the real deal. With honest, reputable advice, installation tips, and answers to technical questions that really matter. That’s why Dayco belts and front engine components are designed, tested and approved by techs, for techs. We understand the challenges you face and the unpredictable repair requests that may roll into your shop. Whether you’re looking for how-to articles and installation videos or would like training and ‘Dayco certification’ on a variety of topics, you’ll find the resources you need right here in Dayco’s Tech Hub.
And if you don’t see the answer you’re looking for in one of our tech articles, tips or videos, feel free to email us directly at [email protected].
For Techs. By Techs.
Timing Belt in Oil – Top 10 Repair Questions
Dayco invented timing belt in oil (TBIO) technology for OEMs to improve engine efficiency and reduce noise.
Timing Chain Kit Installation – Nissan 2.5L Engine
Follow along as our Dayco technician removes and installs a new timing chain kit on a Nissan Altima 2.5L engine.
Timing Chain Kit Installation – GM 1.4L Engine
Dayco's technician performs a timing chain replacement on a GM 1.4 liter engine.
Water Pump Trends and Repair Tips
Here's what you need to know about the shifting water pump market - mechanical pumps still remain commonplace and the electric pump market is growing.
The Growing Timing Chain Market – Service Trends and Insights
The automotive timing chain market continues to expand as OEMs shift from belts to chains. This offers the aftermarket a growing service and repair opportunity as vehicles age.
Timing Belt in Oil
Dayco's head of product management introduces the company's new timing belt-in-oil (TBIO) technology, a breakthrough belt design for the aftermarket. As the inventor and OEM supplier, Dayco's TBIO has transformed how OEMS build engines.
Timing Chain Installation – Toyota 2.5L/2.7L Engine
Follow along as our Dayco technician replaces the timing chain and surrounding components on a 2.5 liter Toyota engine.
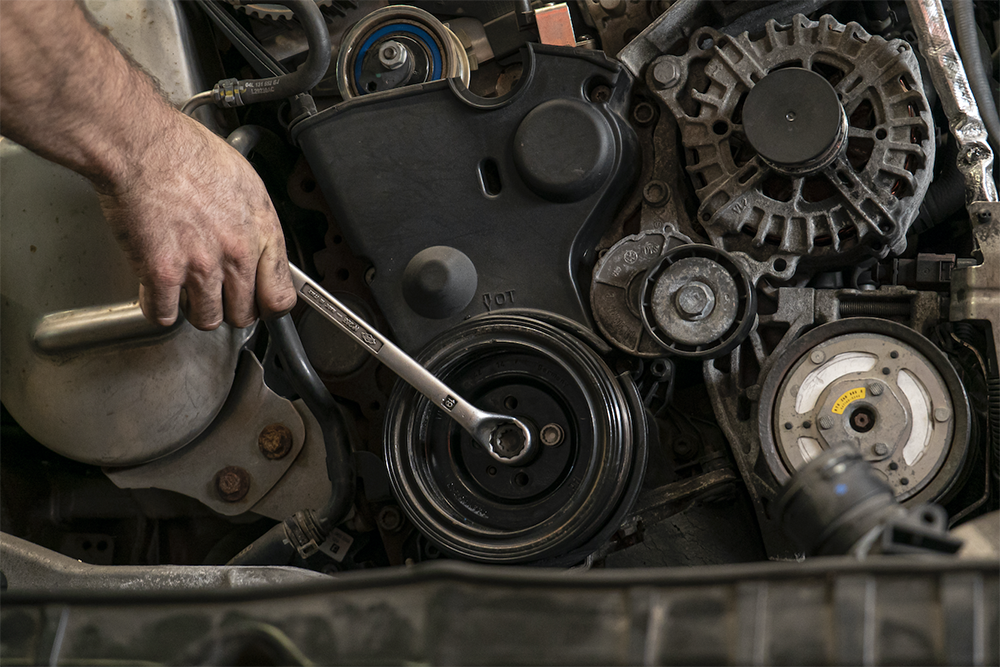
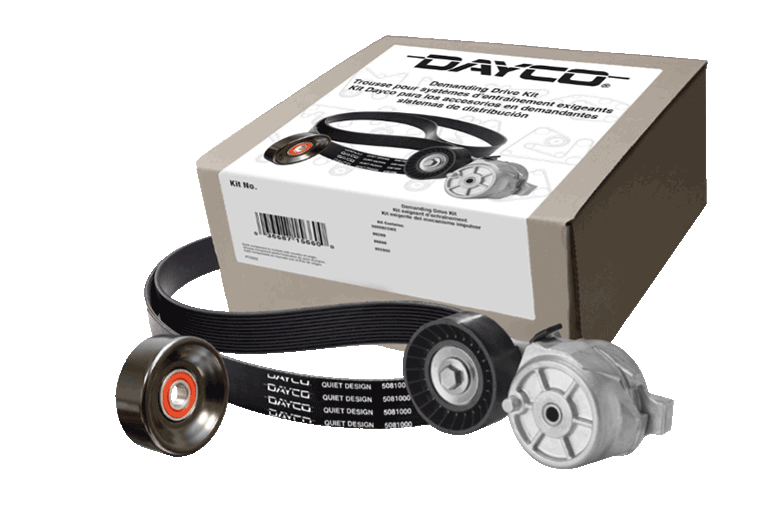
Front-End Accessory Drive System Maintenance Tips
Dayco's head of product management covers the key components in today's light-duty front-end accessory drive systems, addresses maintenance intervals, inspection tips and explains the importance of replacing belts, tensioners and pulleys together.
Front-End Drive System Installation – Ford F-150
Dayco's head of product management walks through the front-end drive system maintenance on his Ford F-150, replacing the main serpentine belt and tensioner, as well as the A/C belt, tensioner and pulley using kit 5060640K1.
Harmonic Balancer Replacement and Install Tips
Our Dayco technician is installing Dayco harmonic balancer #PB1190N on a 6.2 liter engine. Learn the three key reasons a balancer needs to be replaced and walk through the proper way to remove and replace a balancer and the tools needed.
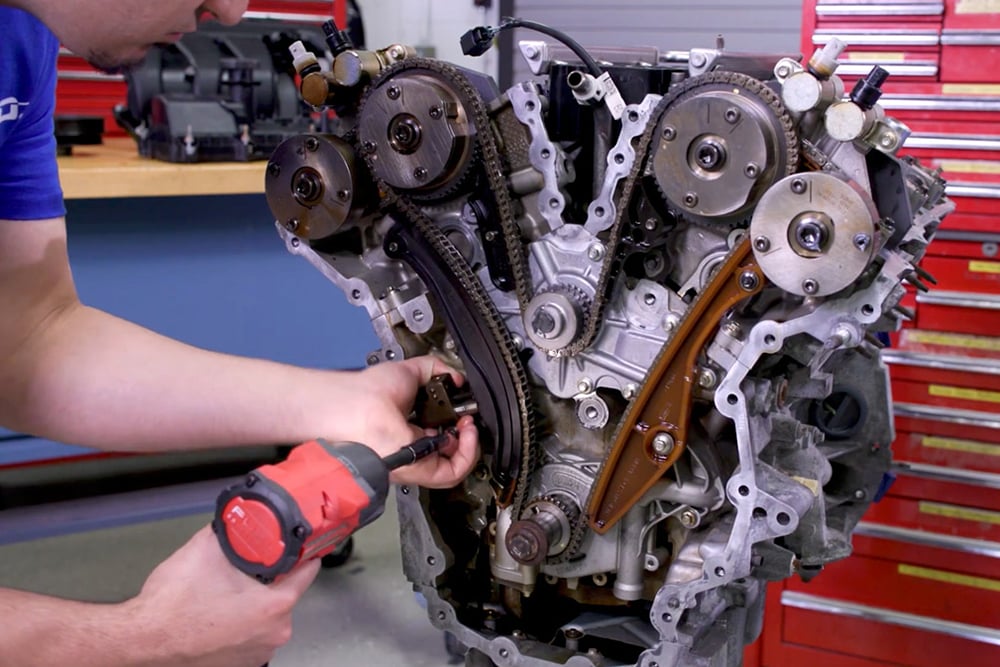
Timing Chain Kit Installation – Honda 2.4L Engine K24A
Join our Dayco tech as he uses master kit KTC1387 to replace all the timing chain components on a Honda 2.4L engine. He’ll show what tools are needed, along with the removal and replacement of the upper chain guide assembly, balance shaft chain and sprockets and the primary guide assembly.
Timing Chain Kit Installation – General Motors LS 5.3L V8 Engine
Our Dayco technician installs a new timing chain and sprockets on a GM LS 5.3L V8 engine. He covers proper torque specifications and the entire installation process using Dayco kit KTC1355.
Timing Chain Kit Installation – Ford 4.0L V6 Engine
This is a complicated engine and kit installation on a Ford 4.0L V6 engine so our tech walks through exactly what tools are needed, along with the proper removal and replacement of all components – from the upper chain guide assembly to the balance shaft components and finally the primary chain system.
Timing Chain Kit Installation – Ford 4.6L/5.4L F-150 V8 Engine
Dayco’s tech team member removes all the chains and surrounding components like roller followers and cam phasers to install a new timing chain kit on a Ford F-150 V8 engine. Learn about special warnings, torque details and how to use the tools accordingly.
Timing Chain Kit Installation – General Motors 2.4L Engine
Grab your tensioner tool, actuator locking tool and Dayco’s timing chain kit #KTC1388, and join our Dayco tech expert as he changes the timing chain on a GM 2.4L engine. He’ll take you step by step through a complete and thorough repair.
Timing Chain Kit Installation – Stellantis/RAM V6 3.6L Engine
Check out how to install the timing chain on a 2011 Stellantis V6 3.6L engine. This video includes special warnings related to positioning, alignment, phaser markings and more. It also references all tools needed and highlights appropriate torque specs.
Timing Chain Kit Installation – Ford 3.5/3.7L V6 Engine
Our Dayco technician replaces the timing chain and surrounding drive system components with kit #KTC1339 on a 2011 Ford AWD V6 engine. This video covers tips for easier installation, water pump replacement, proper torque specifications and alignment criteria.
Timing Chain Kit Installation – General Motors V6 3.6L Engine
Review how to install the timing chain kit on a GM V6 3.6L or 3.0L engine. This video covers tools needed, relevant torque specifications and the order in which components like cam phasers, drive chains and VVT solenoids need to be removed and replaced.
Timing Belt Kit Installation – Honda/Acura V6 3.5L engine
Watch Dayco’s tech expert change the timing belt and water pump with kit #WP329K2A on a Honda V6 3.5L engine. He’ll show you the tools needed as well as how to use the shim kit included in Dayco's timing belt kit to resolve a common Honda and Acura technical service bulletin.
Diagnosing Belt Noise
In this heavy-duty training video, we dive into serpentine belt maintenance intervals, how to measure for belt wear and best practices for troubleshooting belt noise like chirps and squeals.
Dayco HD Belt Line Overview
Learn the benefits of EPDM rubber compounds and how drive systems for commercial vehicle trucks have evolved in this comprehensive training video. Get a complete overview of heavy-duty belt applications, including V-belts, banded belts and FEAD kits.
Dayco Systems Selling & the Importance of Kits
Watch this video to see how front-end drive systems have evolved in heavy-duty trucks, how important serpentine belt kits are when it comes to belt replacement and installation, and the warning signs of tensioner and pulley failure.
Checking for Belt Wear and the Importance of System Replacement
Here are five simple tips to help shops follow the best maintenance procedures for the engine drive system - including how best to check for belt wear and why replacing the tensioner and pulley at the same time is critical.
Timing Chain Installation Tips
This video is perfect for helping counter people understand the basics of timing chain repair - covering the importance of using the right kit, securing the proper tools and accessing important installation information.
Timing Belt Repair Tips
Check out this video for a list of tips on how to ensure proper timing belt repair. From using a kit and changing the water pump to addressing TSBs and cooling system care.
PowerBond by Dayco Harmonic Balancers
Our head of product management walks through the role a harmonic balancer has in the engine, its key parts and the full line of Dayco harmonic balancers.
Using the Dayco FactFinder Tool
Join our expert in the Dayco garage to learn how to accurately measure a belt without a part number. This tool can be used for both automotive and heavy-duty V-belts or serpentine belts.
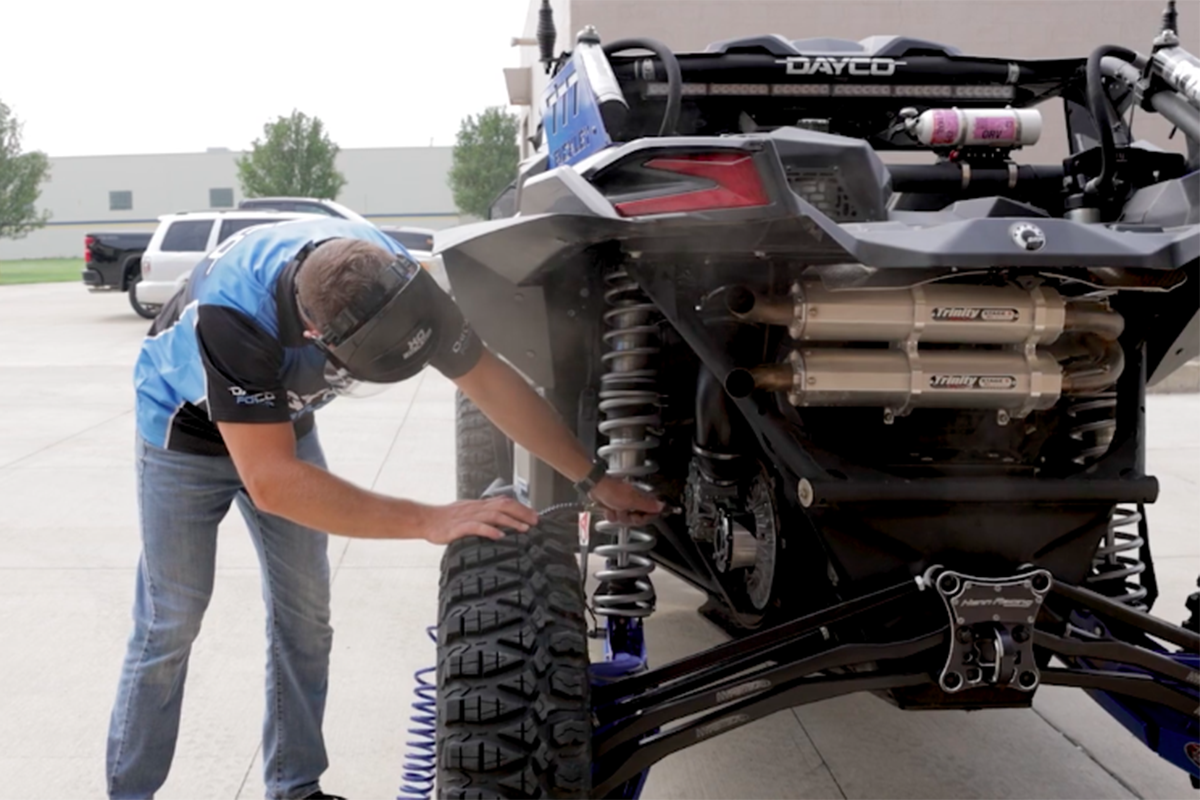
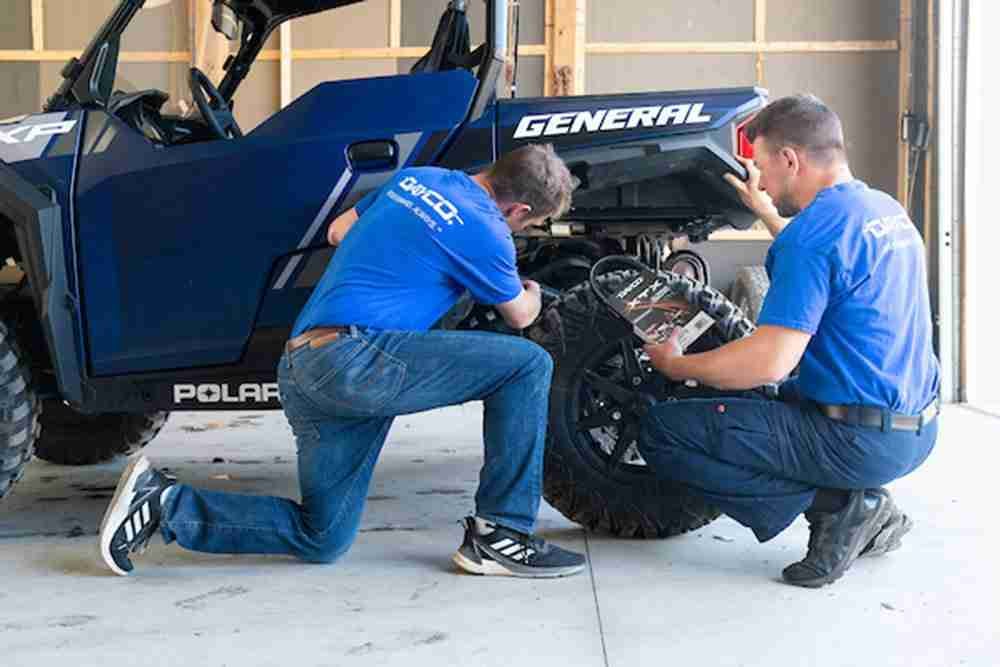
Powersports Belt & Clutch Maintenance
Learn how to extend belt life with proper belt break-in and clutch maintenance from a resident Dayco powersports expert. He explains why short belt life is usually the result of improper break-in, maintenance issues or belt misalignment.
Dayco POWER Belts, For Riders by Riders
Learn about the full line of Dayco POWER belts from one of Dayco’s very own powersports enthusiasts. He’ll walk you through the various types of belt designs for different riding levels and engine sizes.
3 Reasons Electric Water Pumps Fail
Find out the two main reasons why timing chains get replaced and what to do in each circumstance. This video highlights the steps needed to ensure proper timing chain kit replacement when dealing with noise and chain stretch.
Top Two Causes of Timing Chain Repair
Find out the two main reasons why timing chains get replaced and what to do in each circumstance. This video highlights the steps needed to ensure proper timing chain kit replacement when dealing with noise and chain stretch.
Choosing the Right HD Water Pump
Learn about inspection and installation intervals for heavy-duty water pumps from Dayco’s tech team. They share the top do’s and don’ts and explain what happens when the wrong coolant or coolant to water ratio is used in the system.
Measuring Belt Wear
Learn how to use the Dayco Awearness gauge during a proper belt inspection. This quick tutorial shows how to measure the belt’s rib depth and rib profile as well as check for cracks.
HD Serpentine Belt Inspection Tips
Go under the hood of a big rig with Dayco’s tech team members to learn about serpentine belt maintenance for heavy-duty vehicles. They’ll show you how to troubleshoot key issues like noise, misalignment and contamination.
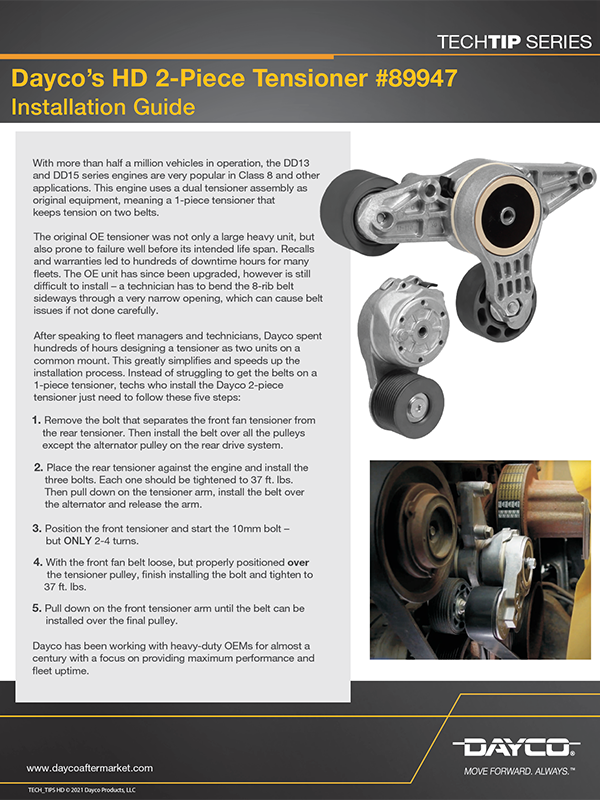
HD Two-Piece Tensioner #89947 DD15 Series Install
Our ASE master tech and product specialist take you step-by-step through the installation of Dayco’s new two-piece tensioner on a Freightliner DD15 engine. This particular tensioner was engineered to be more durable and easier to install.
5 Serpentine Belt Maintenance Tips
Dayco’s engine experts share basic belt tips to help make installation easier. Learn about maintenance intervals, belt wear, troubleshooting noise and more.
Powersports Belt Maintenance
One of Dayco’s product specialists explains the basics of belt installation for your ATV, UTV, side by side (SXS) or snowmobile and the importance of a two-heat cycle break-in process.
Pulleys and 8 Signs of Failure
Learn about the basic types of pulleys for today’s front end drive system and the eight key signs it’s time to change one. Watch as a Dayco product specialist addresses worn pulley bearings, misalignment and more.
OE Quality Tensioner Technology
Dayco’s resident ASE certified technician talks about why Dayco’s tensioner design, and its patented flat spring technology, is preferred by many of today’s OEMs.
Timing Belt Installation & Repair Tools
Dayco’s resident engine experts show you all the tools needed to make timing belt installation easy – from cam sprocket tools to special two-pin tools.
Common Water Pump Installation Errors
Learn the top two reasons water pumps fail after installation. Dayco’s engine experts also talk through torque, cooling system maintenance, why cavitation occurs and the importance of using an OE-quality water pump.
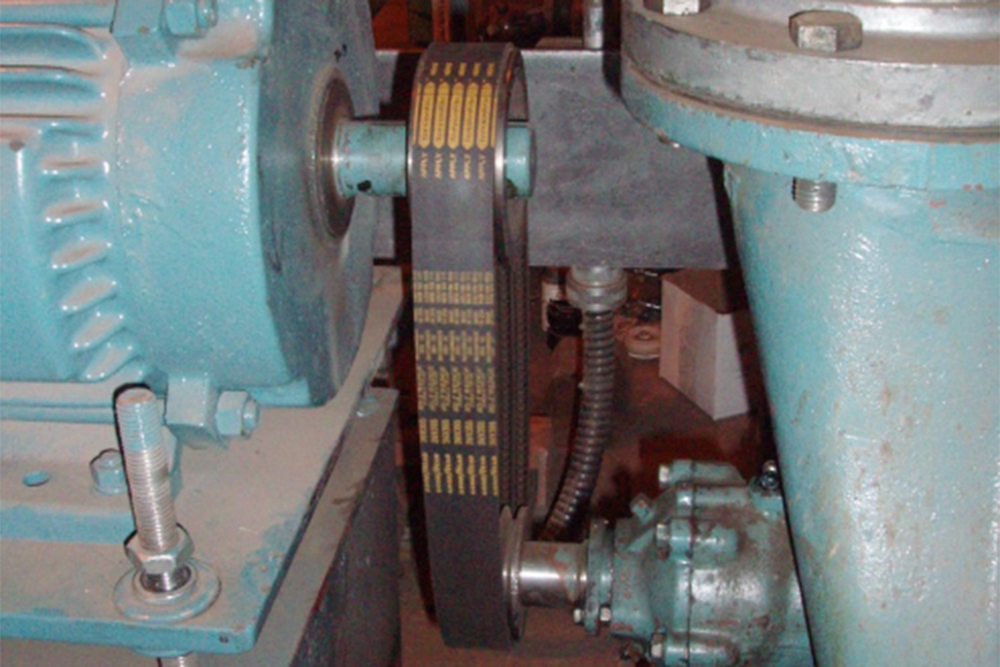
Save Energy Costs by Upgrading Industrial Machines to Synchronous Belts
While there are many benefits of V-belts, synchronous belts continue to rise in popularity ...
Powersports Belt & Clutch Maintenance Tips
Every day our tech team sees post after post on social media forums asking about belt usage ...

Replace serpentine belts, pulleys, tensioners together for best performance
Serpentine belts on today’s cars can have over 10 points of contact, creating very complicated ...
Addressing Common Installation Errors with Electric Water Pumps
Electric water pumps are being used by OEMs more frequently thanks to a number of benefits ...
The Top Two Reasons Timing Chains Need Replacement
Timing chains don’t get a lot of attention – mostly because they are intended to perform for the life of ...

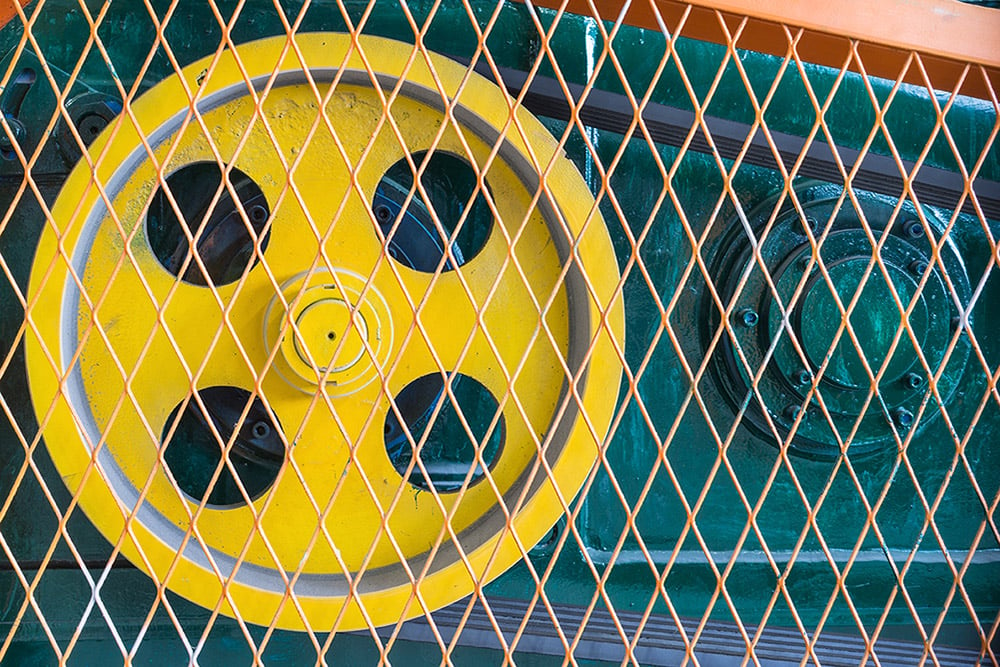
Industrial V-belt Cross Reference for 4L and 5L Belts
Dayco experts suggest switching from a 4L or 5L V-belt for some industrial/HVAC applications to a GOLD LABEL ...

How to Properly Store Industrial V-belts
Many maintenance managers do not have a proper procedure for storing and handling power transmission belts ...
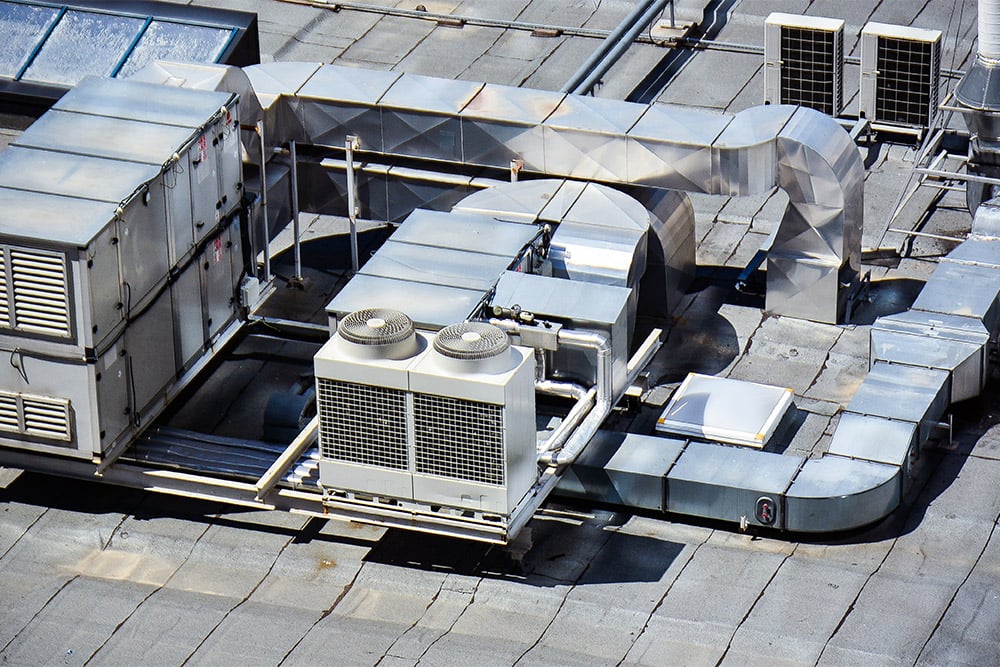
How to Extend the Life of HVAC Belts
Belts used in HVAC applications are frequently found in exhaust and ventilation fans on rooftops. Often exposed to sunlight ...
5 Reasons V-belts Don’t Last as Long as They Should and How Preventative Mainten...
Many maintenance managers report V-belt drives only last two-three months but the reality is premium heavy-duty ...

Step-by-Step Industrial Belt Drive Maintenance
Belt drives are the most cost effective, reliable means of shaft-to-shaft power transmission speed change but ...

Top 3 Timing Belt Tools and Tips
Timing belt maintenance requires precision and patience. One wrong move in belt alignment and the vehicle can experience a number ...

Timing Belts: 3 Signs of Failure
It’s often called the neglected belt yet can cause serious damage when overlooked ...
Increase Performance on Your Industrial Belt Drive
If you have a belt drive system that is under-performing or you’re looking for improved drive life, below are Dayco’s ...
How to Install a Harmonic Balancer
Harmonic balancers are used to help lessen the vibration of the engine. Maintenance and replacement are important. Belowe are the ...
The Top 8 Reasons Why Radiator Hoses Leak
Coolant hoses have a tough job – they move chemicals under pressure and massive amounts of heat so they can ...
CVT Belt Installation and Break-In
For powersports enthusiasts, there’s nothing worse than getting stranded due to a busted belt. That’s why belt replacement and ...
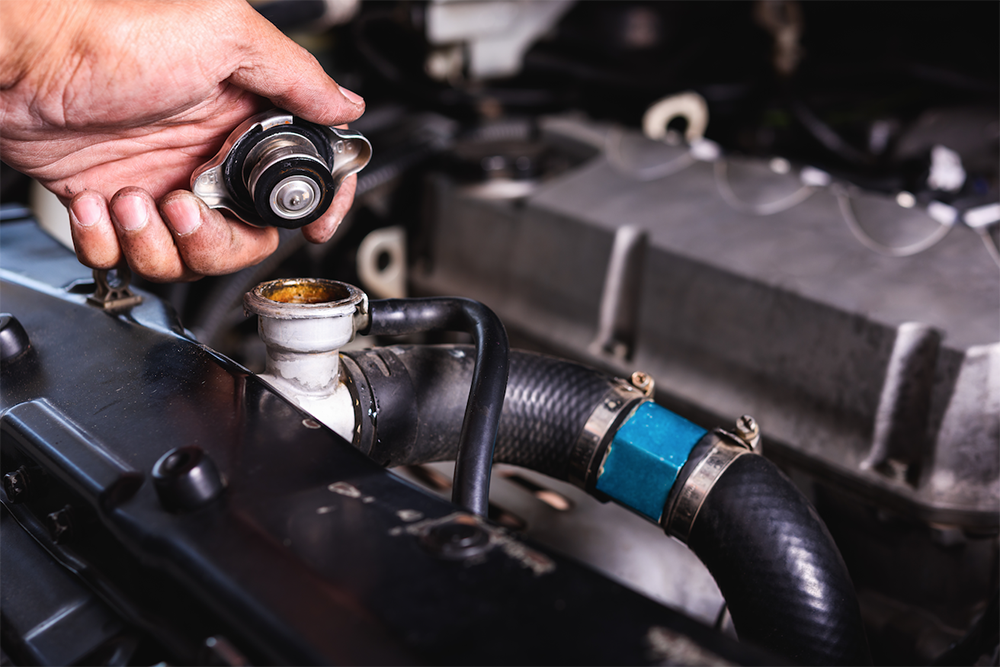
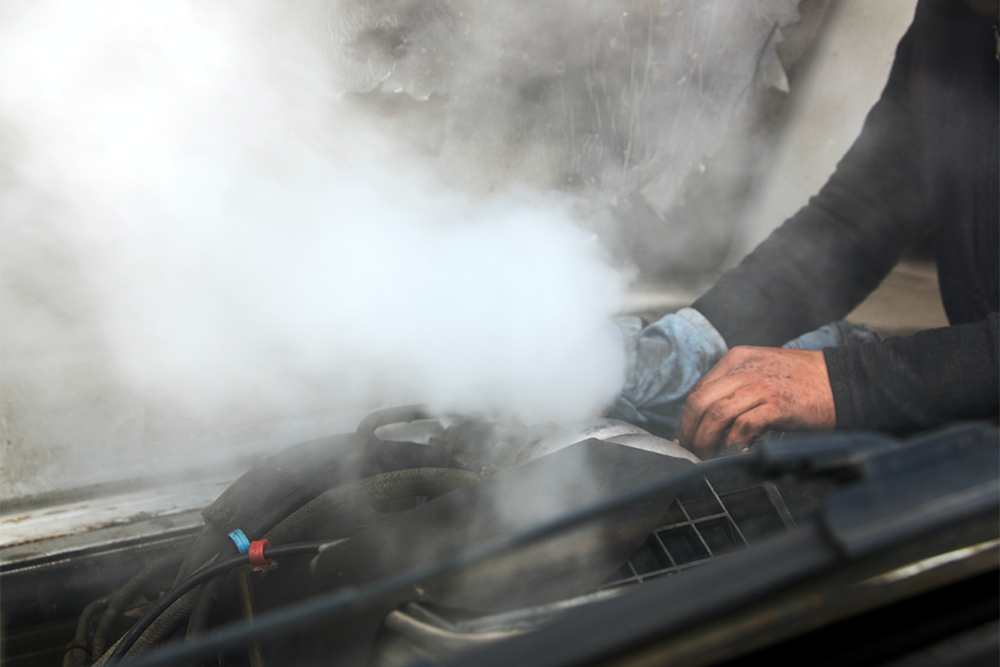
Proper Car Cooling System Maintenance
It is extremely important to flush and refill the cooling system with the OE recommended coolant, whether you are just ...
Three Reasons for Harmonic Balancer Replacement
A harmonic balancer is not just there to spin the rest of the pulleys on the engine. It’s designed to ...
High Performance Balancers vs. Stock Balancers
Many enthusiasts modify their vehicle’s engine for better performance and more horsepower ...

Belt Routing Diagrams
There are more than 16,000 belt routing diagrams available in Dayco’s Find Your Part search platform, covering millions of vehicles ...

Belt Tensioners: Flat Spring Design Makes all the Difference
The front-end drive system’s tensioner is designed to protect other components within the system and to help prevent premature failure ...

Belt Tools Help Reduce Comebacks
At Dayco, we’ve learned that some technicians aren’t checking total system alignment, they are only checking the belt itself. Below ...
Front End Accessory Drive System Maintenance for Heavy-Duty Trucks
Just like many other components on today’s class 4-8 trucks, it’s important that mechanics look at the belt, pulley and ...

Signs of a Bad Belt Tensioner
Often times during a drive belt change, the tensioner may get overlooked. This can be problematic given the tensioner has ...
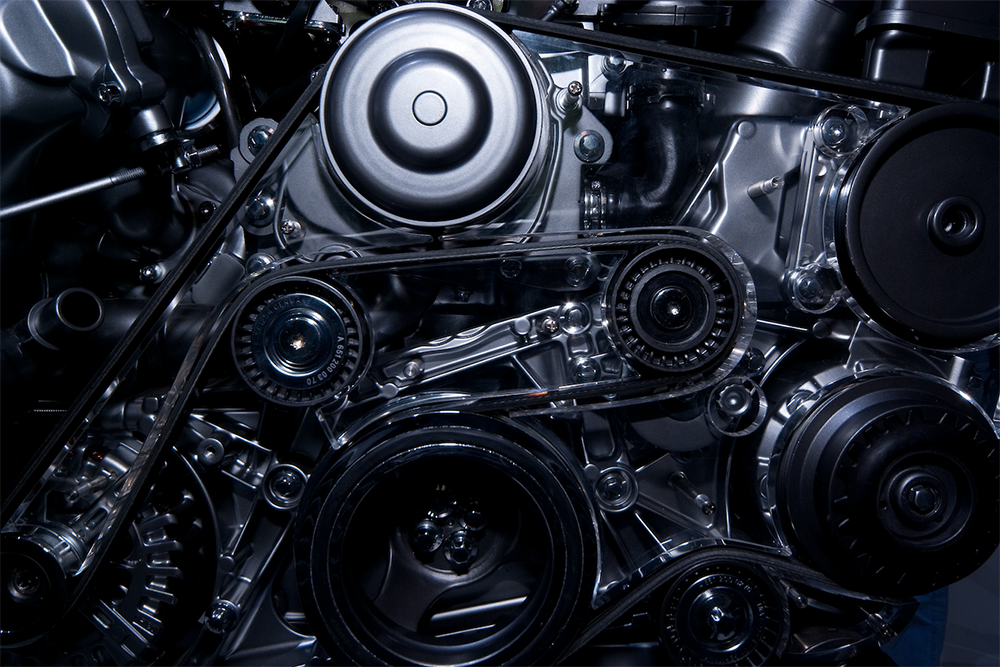
Problematic Automotive Belt Drive Systems
Automotive belt drive systems have become significantly more complicated over the past 25+ years ...

Serpentine Belt Inspection
Most modern vehicles use serpentine belts that are now made with EPDM compounds. But EPDM belts wear differently than the ...
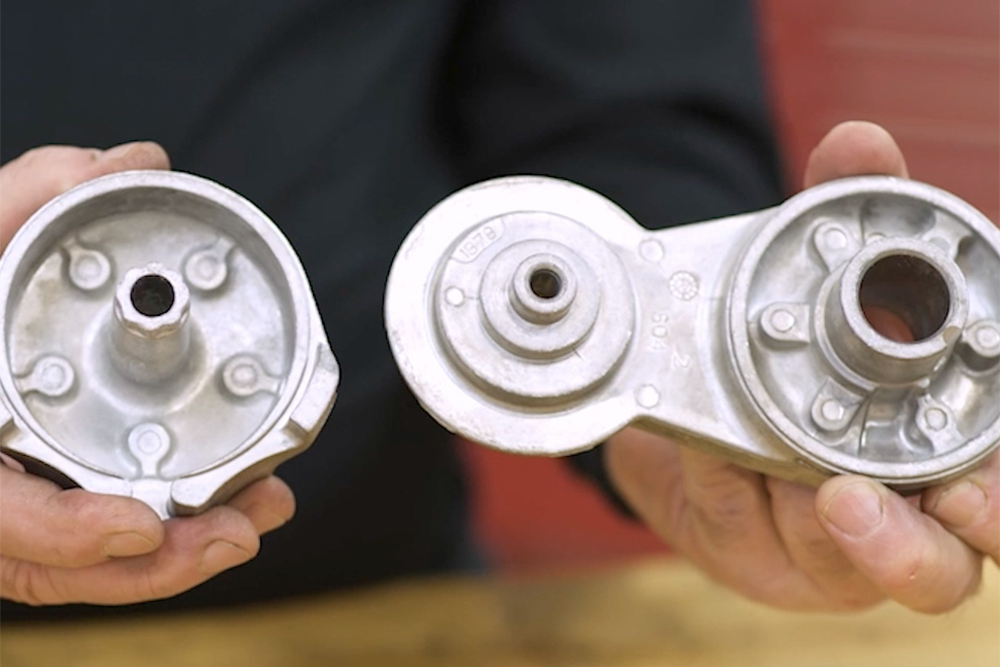
How to Tell when an Idler or Tensioner Pulley Needs to be Replaced
Did you know that one of the most common causes of serpentine belt failure is a pulley with worn bearings? ...

How to Fix Serpentine Belt Noise
If a newly installed serpentine belt is making noise, it is a sign of a problem within the engine’s front ...
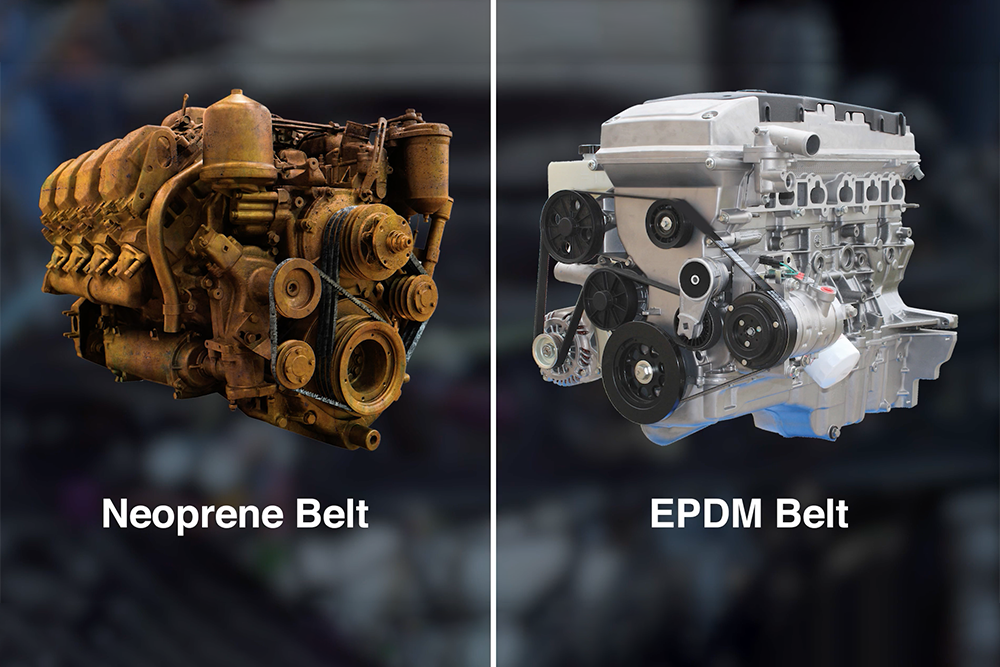
The Evolution of Serpentine Belts
Over the past 25 years, serpentine belts have changed considerably. Vehicles used to have multiple serpentine belts that only had ...

Choosing the Right Engine Water Pump
How do you know you are getting the best quality when it comes to choosing a water pump? Here’s a ...
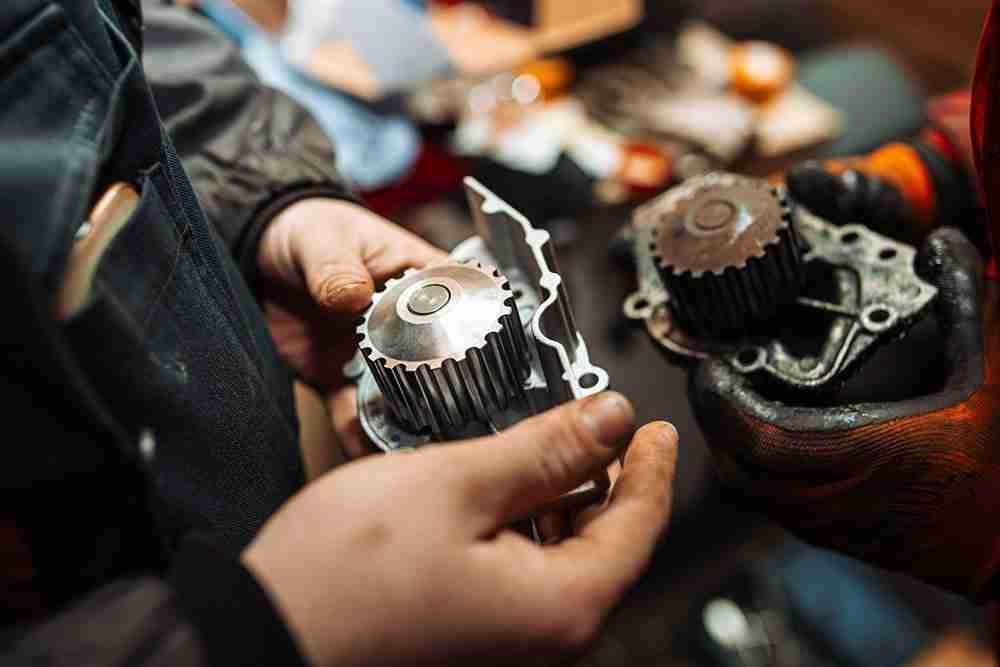
Automotive Water Pump Repair
The purpose of a car’s water pump is to push coolant through the car's engine block, radiator and hoses to ...


It doesn’t matter if you drive a UTV, ATV or snowmobile, you’ll need to break your new powersports CVT belt in using two heat cycles. After following proper installation procedures, slowly bring the machine to normal operating temperature without exceeding 3/4 throttle for about 20 minutes. If at all possible, stay on a flat terrain. Let the machine and belt cool down completely – it should take about 30 minutes. Then run your machine through the same process a second time. Lastly, make sure to check the belt height according to the owner’s manual.
Dayco has more than 16,000 belt routing diagrams available on its Find Your Part search platform. If you come across a specific part number that does not have a diagram, and you can’t find it online or under the hood, feel free to use the Contact Us form and let us know the year, make and model and we’ll look it up and email it to you the same day. You can also call our tech hotline and be connected directly with one of our team members – (800) 848-7902.
Beyond looking at the belt directly for physical signs of damage – such as swelling, cracks, or disfiguration – pay attention to how your car is functioning. Noise is often a telltale sign of a bad belt, as is an issue with your power steering or a/c. Your vehicle could even overheat due to a bad or worn belt.
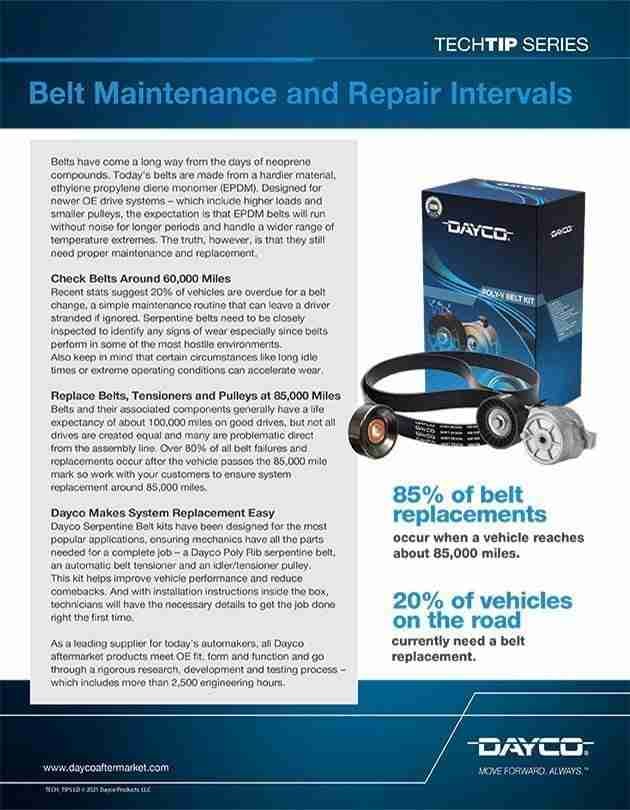
Belt wear can be difficult to detect because newer belts made with EPDM rubber tend to wear like tire tread, where there is material loss from the rib surface. A new belt will have a traditional “V” profile in the grooves between the ribs. On a worn EPDM belt, however, the groove profile will have the appearance of a “U”. One of the best ways to measure wear is by using a device like the Dayco Awearness Gauge, which helps you inspect a belt three different ways – by analyzing rib depth, checking rib profile and identifying cracks. If your belt has 90,000 miles or more, it is definitely time to change it.
Without maintenance history of a car, the best possible way is to check CarFax for a repair history report, ask the previous owner, or look for a sticker under the hood indicating it has been changed. If all these fail, best course is to have a technician inspect it. Some OEMs recommend replacement as early as 30,000 miles, while others suggest maintenance around 100,000 miles. While timing belts are relatively inexpensive, if one breaks while the engine is running, it could cost thousands of dollars in damage so it’s important to be proactive. The best course of action is to change the belt if you cannot verify that it has been replaced at the OE suggested intervals.
Most timing belts will have two double dotted line marks and 4 to 6 solid marks. Double dotted lines are for the crankshaft, and the solid line is for camshaft alignment. Dayco includes detailed instructions with all timing kits so follow the instructions closely as they vary by make and model. Proper timing belt installation is critical to engine performance and long belt life. A belt installed incorrectly can cause immediate engine damage.
What is the correct serpentine belt to use if I’m installing a 25% overdrive or underdrive balancer?
As long as nothing is removed from the routing system, like the A/C compressor, the OE stock belt length will still work. You can use our Find Your Part search or the Dayco app to find the recommended Dayco replacement belt.
When a belt breaks quickly after installation, it is likely due to one of the four reasons:
- It was not 100% seated in a pulley.
- Worn pulley bearings caused the belt to “walk off” the pulley surface.
- A damaged pulley could have ‘cut’ the belt.
- A malfunctioning tensioner caused belt misalignment and damage.
Be sure to check the tension and fit before completing the job and remember to change the pulley and tensioner when you replace a belt to avoid any issues like this.
There are two very distinct noises caused by different issues – one is a chirp, the other is a squeal. Your best course of action is to conduct a water test to see which one you are dealing with. With the vehicle idling, spray water on the belt’s rib surface. Then listen closely. If you hear a sharp, high-pitched, repetitive noise of short duration that is worse at low engine speeds (idle), you are dealing with a chirp alignment issue. If you hear a high-pitched noise that typically lasts several seconds and increases in volume as engine speed increases, you are dealing with a squeal, which is typically caused by a slip between the belt and pulleys. The noise will go away with the water spray if it’s a squeal, it will not if it’s a chirp.
There’s a few possible causes for a chirp: pulley misalignment, improper installation, extremely worn belt ribs, worn pulley bearings or contamination. We suggest the following solutions:
- Check alignment of all pulleys, either with a straight edge or a laser alignment tool.
- Ensure all accessory pulleys and brackets are tightened snug to mounting surfaces.
- Inspect and replace all accessories/pulleys that are difficult to rotate (i.e. rough/seized bearings) or show excessive wobble/free rock.
- Double check the power steering pulley and harmonic balancer, as they are often a common cause for misalignment.
A squeal is usually caused by low bely tension or contamination. To rectify the problem, we suggest the following steps:
- Properly tension manual applications during installation (35 lbs. per rib) and then re-tension after 5 minutes of run-in (30 lbs. per rib). This allows the belt to seat in the pulleys.
On vehicles with automatic belt tensioners, the tensioner pulley should turn freely without binding. The tensioner arm should move smoothly through its entire range of motion and there should be adequate tension. Always check the tensioner bearing for noise and wear. Replace any tensioner where the bearing feels rough or the pulley has signs of excessive run-out (wobble).
- With the belt removed, inspect all accessory pulleys and idlers to ensure free and smooth rotation. If there is binding or rough rotation (dry bearing), then the pulley and/or accessory should be replaced.
- Check for contamination. If the belt has been in contact with motor oil, power steering fluid, antifreeze or any other petroleum-based lubricant, it will cause the EPDM belt to swell, leading to noise. Other than washer fluid, replace any serpentine belt that has been oil soaked. NEVER try to solve issues with belt dressing.
Regular inspection of all drive belts, tensioners and accessories should be recommended once the vehicle passes 60,000 miles. And when the belt is worn and ready for replacement, which is typically around 90,000 miles, the pulley and tensioner should also be replaced. That’s because the drive works as a system. Replacing only the belt will often result in short belt life because the tensioner likely has worn springs or the pulleys’ bearings are worn and causing a slight misalignment. Even the pulleys themselves can wear and cause reduced belt life and/or noise. Replacing the entire front end accessory drive system will result in another 90,000 miles of trouble free driving.
Belt wear can be difficult to detect because newer belts made with EPDM rubber tend to wear like tire tread, where there is material loss from the rib surface. A new belt will have a traditional “V” profile in the grooves between the ribs. On a worn EPDM belt, however, the groove profile will have the appearance of a “U”. One of the best ways to measure wear is by using a device like the Dayco Awearness Gauge, which helps you inspect a belt three different ways – by analyzing rib depth, checking rib profile and identifying cracks. If your belt has 90,000 miles or more, it is definitely time to change it. Check out our video for a step-by-step guide of measuring belt wear.
It could be. The water pump is responsible for the cooling system and pulling heat away from the engine. If the pulley is loose or if you notice signs of a leak around the water pump’s weep hole, it’s time for a change. Be sure however that when replacing the water pump, you also drain, flush and refill the cooling system with the OE specified coolant mix. The seal in the pump is designed only to work with this chemistry. This is the #1 cause of leaks in new water pumps. Most modern vehicles use organic acid coolants.
It’s best practice to change both components at the same time because they usually wear out at the same pace and if one fails or is failing, the other is likely not far behind it. They are both part of the same system and need to function at optimal levels as well.
The Dayco Underdrive and overdrive balancers are a great way to increase the performance of your factory supercharged car. These balancers feature pulleys that are either larger or smaller than the factory supercharger pulley. Spinning the supercharger faster will increase the amount of supercharger boost pressure and in turn, increase the horsepower of the engine. Installing these pulleys does require professional dynamometer calibration of the engine computer by a qualified shop. And additional parts such as larger fuel injectors may be needed to take full advantage of the increased boost. Dayco offers professional advice and assistance in choosing the right balancer for your engine build by calling our tech line or using the contact us form on our website.
You’ll want to replace the balancer if you notice excessive vibration, crankshaft oil leaks, or deteriorated rubber.
You’ll want to replace the balancer if you notice excessive vibration, crankshaft oil leaks, or deteriorated rubber.
The PowerBond™ by Dayco SS series uses the factory balance weights; The race balancer is for engines with zero balance. If you need help choosing the correct balancer for your engine build, please contact the Dayco tech team at (800) 848-7902 for advice and part numbers.
On some late model GM engines, the balancer is a press fit instead of using a keyway to hold it in place. This works fine until a supercharger kit is added. The additional stress of the belt driven supercharger requires either a keyway be machined or the use a balancer pin kit, which is available from many speed shops.
The regular harmonic balancers are not meant for race cars but they offer engine builders and technicians a high-quality replacement to standard OEM balancers for everyday vehicles. Racing balancers are made from more robust materials like forged steel so they can withstand much higher RPMs.
The Dayco balancer fits a multitude of applications, some of which do require the keyway. If yours does not, you can fill in the keyway with silicone.
A belt tensioner should be replaced if any of the following issues are noted:
- You hear noise or feel resistance as that could be a sign of potential bearing failure.
- The belt is not tracking correctly as that could mean a loss of tension.
- There is sticking or notchy movement. With the belt removed, use a tool to move the tensioner through its entire range of motion. It should move smoothly from stop to stop without any movement between the tensioner body and arm.
- There is metal to metal contact or broken/cracked tensioner stops.
There are several signs a pulley is no longer functioning properly. First, check for free rock. There should be no movement or play from side to side. Next, look for misalignment. It will cause a belt chirp noise and is often the result of worn bearings. Spin the pulley with the belt removed, if it spins more than one revolution, the bearing grease is depleted and the pulley should be replaced. Roll the pulley by hand to feel for rough spots during rotation. You’ll also want to check for physical damage like cracked or broken pulleys, discoloration, surface build-up or excessive wear. Finally, a pulley with seized bearings is also a sign replacement is needed.
Unlike laser tools with attachments, Dayco’s tool has an aluminum body with magnets that secure it into the grooves of the reference pulley (usually the crankshaft pulley), ensuring a stable stage for accurate laser projection. The target component is also magnetic so it easily attaches and aligns with the grooves. Once turned on, the laser will project a line – not just a dot – which is an advantage over other laser tool designs. This projected line makes it possible to identify both axial and angular misalignment. Axial misalignment means the pulley is not positioned on the shaft properly. Angular misalignment is caused by a severely worn bearing within the pulley. Before using this tool, always make sure to disconnect the vehicle’s battery. Also, remove the vehicle’s serpentine belt before inspecting the accessory drive system.
The force of the belt being installed can often push a pulley out of alignment. When the system is relaxed, it might not be apparent. Start by checking all bearings in the pulleys and tensioner for any side to side play. Rotate the tensioner stop to stop while observing the tensioner body for movement. There should be none. Then, inspect the grooves in the tensioner pulley and idler pulleys for contamination or wear. If you are still having issues, conduct a noise test. With the vehicle running, spray water on the belt. If you hear a chirping noise, there is misalignment somewhere in the system. If the belt is squealing, where the noise goes away and returns quickly, there is an issue with tension and the tensioner should be replaced.
Most hoses require replacement – regardless of where they are at on a vehicle – once every four years. However, we recommend following the OE specifications on replacement intervals.
It’s often difficult to look at a hose and know whether it’s faulty. Some physical signs a hose is bad is when it’s collapsed, broken, if it’s brittle or stiff. Most hoses are pliable and soft so anything other than that should indicate the need for further inspection. Other signs that suggest a hose is bad is if you see signs of leaks or bulging around the connection to the clamp.
Harmonic Balancer Replacement and Install Tips
Harmonic Balancer Replacement and Install Tips
Our Dayco technician is installing Dayco harmonic balancer #PB1190N on a 6.2 liter engine. Learn the three key reasons a balancer needs to be replaced and walk through the proper way to remove and replace a balancer and the tools needed.
Timing Chain Kit Installation – Honda 2.4L Engine K24A
Timing Chain Kit Installation – Honda 2.4L Engine K24A
Join our Dayco tech as he uses master kit KTC1387 to replace all the timing chain components on a Honda 2.4L engine. He’ll show what tools are needed, along with the removal and replacement of the upper chain guide assembly, balance shaft chain and sprockets and the primary guide assembly.
Timing Chain Kit Installation – General Motors LS 5.3L V8 Engine
Timing Chain Kit Installation – General Motors LS 5.3L V8 Engine
Our Dayco technician installs a new timing chain and sprockets on a GM LS 5.3L V8 engine. He covers proper torque specifications and the entire installation process using Dayco kit KTC1355.
Timing Chain Kit Installation – Ford 4.0L V6 Engine
Timing Chain Kit Installation – Ford 4.0L V6 Engine
This is a complicated engine and kit installation on a Ford 4.0L V6 engine so our tech walks through exactly what tools are needed, along with the proper removal and replacement of all components – from the upper chain guide assembly to the balance shaft components and finally the primary chain system.
Timing Chain Kit Installation – Ford 4.6L/5.4L F-150 V8 Engine
Timing Chain Kit Installation – Ford 4.6L/5.4L F-150 V8 Engine
Dayco’s tech team member removes all the chains and surrounding components like roller followers and cam phasers to install a new timing chain kit on a Ford F-150 V8 engine. Learn about special warnings, torque details and how to use the tools accordingly.
Timing Chain Kit Installation – General Motors 2.4L Engine
Timing Chain Kit Installation – General Motors 2.4L Engine
Grab your tensioner tool, actuator locking tool and Dayco’s timing chain kit #KTC1388, and join our Dayco tech expert as he changes the timing chain on a GM 2.4L engine. He’ll take you step by step through a complete and thorough repair.
Timing Chain Kit Installation – Stellantis/RAM V6 3.6L Engine
Timing Chain Kit Installation – Stellantis/RAM V6 3.6L Engine
Check out how to install the timing chain on a 2011 Stellantis V6 3.6L engine. This video includes special warnings related to positioning, alignment, phaser markings and more. It also references all tools needed and highlights appropriate torque specs.
Timing Chain Kit Installation – Ford 3.5/3.7L V6 Engine
Timing Chain Kit Installation – Ford 3.5/3.7L V6 Engine
Our Dayco technician replaces the timing chain and surrounding drive system components with kit #KTC1339 on a 2011 Ford AWD V6 engine. This video covers tips for easier installation, water pump replacement, proper torque specifications and alignment criteria.
Timing Chain Kit Installation – General Motors V6 3.6L Engine
Timing Chain Kit Installation – General Motors V6 3.6L Engine
Review how to install the timing chain kit on a GM V6 3.6L or 3.0L engine. This video covers tools needed, relevant torque specifications and the order in which components like cam phasers, drive chains and VVT solenoids need to be removed and replaced.
Timing Belt Kit Installation – Honda/Acura V6 3.5L engine
Timing Belt Kit Installation – Honda/Acura V6 3.5L engine
Watch Dayco’s tech expert change the timing belt and water pump with kit #WP329K2A on a Honda V6 3.5L engine. He’ll show you the tools needed as well as how to use the shim kit included in Dayco’s timing belt kit to resolve a common Honda and Acura technical service bulletin.
Diagnosing Belt Noise
Diagnosing Belt Noise
In this heavy-duty training video, we dive into serpentine belt maintenance intervals, how to measure for belt wear and best practices for troubleshooting belt noise like chirps and squeals.
Dayco HD Belt Line Overview
Dayco HD Belt Line Overview
Learn the benefits of EPDM rubber compounds and how drive systems for commercial vehicle trucks have evolved in this comprehensive training video. Get a complete overview of heavy-duty belt applications, including V-belts, banded belts and FEAD kits.
Dayco Systems Selling & the Importance of Kits
Dayco Systems Selling & the Importance of Kits
Watch this video to see how front-end drive systems have evolved in heavy-duty trucks, how important serpentine belt kits are when it comes to belt replacement and installation, and the warning signs of tensioner and pulley failure.
Want to meet the tech experts behind all the advice, installation videos and repair tips we share? Check out our crew. With over 100 years of combined on-the-job experience, our ASE certified techs, product specialists and engineers have one goal – to make the installation process as seamless as possible for today’s technicians and engine builders.

Jerry DeGelder
AKA “Tech Guy”
Years of Experience: 30
ASE Certified Technician
Jerry DeGelder’s connection with cars started alongside his dad, working on the family vehicle. He’s been ASE certified for nearly 25 years and has an associate’s degree in automotive technology. With a childhood dream of teaching, Jerry went through the training needed to become an automotive industry technical trainer in 1995. He plays an active role on Dayco’s technical team, conducting in-person training sessions and fielding calls from technicians looking for specific parts or solutions to mechanical issues.

Jerry Reeves
AKA “Engineering Nerd”
Years of Experience: 23
Mechanical Engineer, Former State of Michigan Certified Technician, Weekend Road Racer
An industry veteran, Jerry Reeves has more than two decades of program management and product launch experience. Passionate about all things automotive and powersports, Jerry earned a mechanical engineering degree from Kettering University after taking two years of automotive repair in high school – going from working on cars and parts to designing them. He’s been state certified in front end, suspension and steering systems, engine tune up and performance, engine repair and brakes and braking systems. He has a weakness for cool cars, with a modified Nova, Challenger and Corvette currently in the stable, as well as a motorcycle that he races. One of his best memories was participating in the 2,300-mile Hot Rod Power Tour with his sons.

Jon Crawford
AKA “Performance Champ”
Years of Experience: 15
Mechanical Engineer, Weekend Road Racer
As an automotive, motorcycle, snowmobile and ATV enthusiast, it’s no surprise that Jon Crawford is an operations and tech expert for Dayco. Tinkering on vintage Corvettes and small engines since he was 8, Jon has 15 years of automotive aftermarket experience. He earned his mechanical engineering degree from University of Toledo and has scored multiple national championships in motorcycle amateur road racing. Never one to pass up an opportunity to fix something under the hood, his favorite memory was restoring his late father’s 1973 Corvette and driving it to the Woodward Dream Cruise.

Chad Suffel
AKA “Ironman”
Years of Experience: 15
Former Package Engineer, Avid DIYer, Current Product Manager
Chad Suffel has been getting fired up about cars since he was young. It all began alongside his dad wrenching on an LS1 Camaro, and grew stronger as he headed to college, where he graduated with a B.S. in packaging from MSU. A true hot rodder, DIY tuner and avid motorcyclist, Chad has not only gotten his hands dirty on a number of machines at Dayco, he also leads the development of new tensioners, pulleys, water pumps and timing chain kits. If you’re trying to track him down, check outside – he’s either in the garage tinkering on his motorcycle, or off running, swimming or biking absurdly long distances, as he is a regular Ironman participant.

Hassan Mourad
AKA “Diagnostic Doctor”
Years of Experience: 19
State of Michigan Certified Master Technician
Hassan Mourad’s fascination with cars began his freshman year of high school thanks to a very passionate auto tech teacher. As a state of Michigan master tech and a product evaluation expert for Dayco, he’s well versed in solving diagnostic issues and benchmarking new products, plus he’s a regular in the Dayco TechKnow series timing chain kit installation videos. If Hassan’s not at work or under the hood wrenching on the next project car, you may find him at the track, participating in amateur racing days.